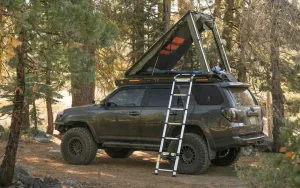
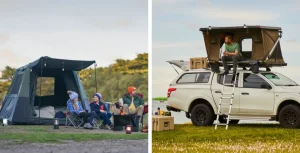
Rooftop tents have changed the way we camp. They provide comfort and convenience while keeping you elevated off the ground. However, many adventurers want to customize their setups to enhance their camping experiences. DIY modifications can significantly improve your rooftop tent and awning setup. This blog will explore various DIY modifications that can elevate your outdoor adventures. You will discover how to create a more functional, comfortable, and enjoyable camping experience.
Understanding Rooftop Tents and Awning Setup
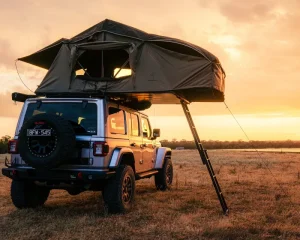
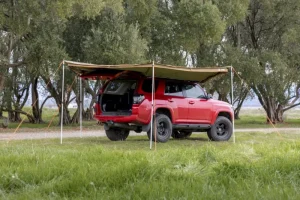
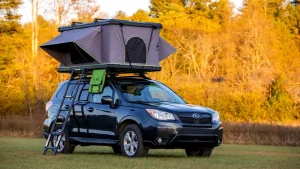
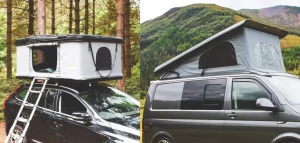
To make the most of your rooftop tent and awning setup, it’s essential to understand their components. A rooftop tent attaches to the roof of your vehicle, providing a cozy sleeping area. On the other hand, an awning extends from the side of your vehicle. It offers shade and protection from rain and wind. Together, these elements create a comfortable outdoor living space.
The Benefits of a DIY Approach
Choosing a DIY approach allows you to tailor your rooftop tent and awning setup to your specific needs. Here are some key benefits of DIY modifications:
Customization: You can design your setup according to your preferences. Choose colors, materials, and features that suit your style.
Cost-Effectiveness: DIY modifications often save money compared to purchasing pre-made accessories. You can invest in quality materials and create something unique.
Enhanced Functionality: Custom modifications can improve the usability of your setup. You can add storage, lighting, or ventilation to suit your camping style.
Satisfaction: Completing a DIY project brings a sense of accomplishment. You’ll feel proud knowing you crafted a setup that enhances your outdoor adventures.
Popular DIY Modifications for Your Rooftop Tent
1. Improved Ventilation
Proper ventilation is essential inside a rooftop tent. Without it, condensation can build up, leading to discomfort. To enhance ventilation, consider these modifications:
Additional Vents: Install extra vents in your rooftop tent. Purchase vent kits specifically designed for tents. Place them strategically for maximum airflow. Ensure you seal any openings to prevent leaks.
Mesh Screens: Attach mesh screens to the windows of your tent. This keeps bugs out while allowing fresh air to flow. Use adhesive Velcro or sew the screens in place. This simple addition can make a huge difference in comfort.
2. Interior Organization Solutions
Keeping your rooftop tent organized enhances your camping experience. Here are some DIY storage solutions:
Wall Storage Pockets: Create or purchase fabric pockets that can hang on the tent walls. These pockets can hold small items like phones, keys, and snacks. Use lightweight materials to avoid adding unnecessary weight.
Hanging Racks: Install hooks or adjustable racks inside the tent. These can hold clothing, gear, or cooking utensils. You can easily find lightweight hooks designed for outdoor use.
3. Upgraded Sleeping Comfort
The mattress that comes with your rooftop tent might not provide the comfort you desire. Consider upgrading for a better night’s sleep:
Memory Foam Topper: Add a memory foam mattress topper to your existing mattress. This addition enhances comfort and support without requiring a complete replacement.
Custom Mattress: For a truly personalized touch, consider ordering a custom mattress. Measure your tent’s dimensions and choose materials that suit your comfort preferences.
4. Insulation for Temperature Control
Temperature control can be a challenge while camping. Insulating your rooftop tent can make a significant difference. Here’s how:
Reflective Insulation: Use reflective insulation materials to line the interior of your tent. This modification helps keep the tent cooler in summer and warmer in winter. You can find these materials at most hardware stores.
Thermal Blankets: Hang thermal blankets inside your tent. They help regulate temperature and add an extra layer of comfort. Choose lightweight blankets that are easy to pack.
Enhancing Your Awning Setup
Your awning setup is vital for creating a comfortable outdoor space. It provides shade, shelter, and a place to relax. Here are some DIY modifications to enhance your awning setup:
1. Adjustable Awning Height
An adjustable awning height can improve usability. Consider these options:
Telescoping Poles: Install telescoping poles to support your awning. This modification allows you to adjust the height based on your needs. Lower the awning for better wind resistance or raise it for more clearance.
Quick-Release Mechanism: Add a quick-release mechanism to your poles. This feature enables easy adjustments without hassle. Look for hardware designed to withstand outdoor conditions.
2. Extended Coverage Solutions
If your awning doesn’t provide enough coverage, consider these modifications:
Side Panels: Sew or attach fabric side panels to your awning. These panels offer additional protection from wind and rain, creating a more comfortable space.
Awning Extensions: Create or purchase extensions that attach to your existing awning. These extensions can offer extra shade and shelter, making your outdoor setup more versatile.
3. Lighting Solutions for Evening Use
Good lighting enhances the usability of your awning setup at night. Consider these DIY lighting ideas:
Outdoor String Lights: Hang weather-resistant string lights under your awning. They create a cozy atmosphere for evening gatherings. Choose lights that are easy to install and durable.
LED Strip Lights: Install LED strip lights along the edges of your awning. These lights provide bright, energy-efficient illumination. You can control brightness and color to set the mood.
Creating a Multi-Functional Space
Your rooftop tent and awning setup can serve multiple purposes. Here are some DIY modifications to create a versatile outdoor space:
1. Outdoor Kitchen Area
Setting up an outdoor kitchen can significantly enhance your camping experience. Here’s how to create one:
Portable Cooking Station: Use a folding table as your cooking station. Add hooks or racks for utensils and cooking supplies. This setup keeps everything organized and easily accessible.
Storage Solutions: Use bins or crates to store food and cookware. Keep these under your awning for easy access. Label each container for better organization.
2. Outdoor Living Room
Transform your awning setup into a cozy living area. Here are some ideas:
Camping Chairs and Tables: Include lightweight camping chairs and a small table under your awning. This space can serve as a dining area or a relaxation zone for the family.
Privacy Screens: Add privacy screens or curtains to your awning setup. This modification creates a more intimate atmosphere and protects you from curious onlookers.
Practical Tips for DIY Modifications
Before starting your DIY projects, keep these practical tips in mind:
1. Plan Your Modifications
Take time to plan your modifications. Identify what you want to achieve with your rooftop tent and awning setup. Sketch your ideas and make a list of materials needed.
2. Choose Quality Materials
Invest in quality materials for durability and performance. Look for weather-resistant fabrics and sturdy hardware. Quality materials ensure your modifications withstand outdoor conditions.
3. Safety First
Always prioritize safety when making modifications. Use proper tools and wear protective gear. Ensure your modifications do not compromise the structural integrity of your tent or awning.
4. Test Your Modifications
After completing your DIY projects, test everything before your next camping trip. Set up your rooftop tent and awning in your backyard or a safe area. Check for stability and functionality. Make adjustments as needed.
Maintaining Your Rooftop Tent and Awning Setup
Proper maintenance extends the life of your rooftop tent and awning setup. Follow these tips to keep everything in top shape:
1. Regular Cleaning
Keep your rooftop tent and awning clean. Dirt and debris can lead to wear and tear. Use a soft brush or cloth to remove dirt. Avoid harsh chemicals that could damage the fabric.
2. Inspect for Damage
Regularly check your tent and awning for signs of damage. Look for rips, tears, or worn areas. Address any issues promptly to prevent further damage. Patch small holes with tent repair kits.
3. Store Properly
When not in use, store your rooftop tent and awning properly. Ensure everything is clean and dry before packing. Store them in a cool, dry place to prevent mold and mildew.
Conclusion
DIY modifications can significantly enhance your rooftop tent and awning setup. From improved ventilation to upgraded mattresses, the possibilities are endless. These modifications increase comfort and boost functionality.
Whether you’re planning a weekend getaway or an extended camping trip, an optimized setup makes all the difference. Embrace your creativity and customize your rooftop tent and awning setup to meet your family’s needs. With these enhancements, you can enjoy memorable outdoor experiences.
So, gather your tools and materials. Start planning your DIY projects today. Your next camping adventure awaits, and with your personalized rooftop tent and awning setup, you will create unforgettable memories. Happy camping!